Difference between revisions of "The Tao of Rue Extraction"
m (→Step 6 - Manske) |
m (→Step 6 - Manske) |
||
| Line 199: | Line 199: | ||
=== Step 6 - Manske === | === Step 6 - Manske === | ||
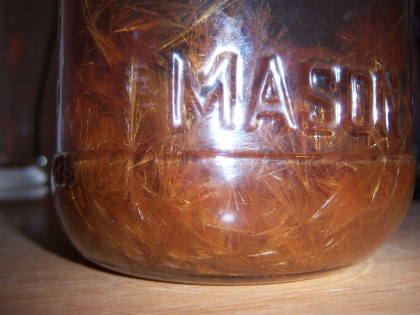
| − | Once you have redissolved your alkaloids in a minimal amount of fresh, hot vinegar or as The Day Tripper pointed out, a fumaric acid solution, it's time to manske them. Day Trippers fumaric acid approach leads to chunkier crystals later. Vinegar will lead to needle like crystals as pictured to the right. The appearance of the crystals doesn't really matter at this point because they'll be redissolved several times during the cleanup steps | + | Once you have redissolved your alkaloids in a minimal amount of fresh, hot vinegar or as The Day Tripper pointed out, a fumaric acid solution, it's time to manske them. Day Trippers fumaric acid approach leads to chunkier crystals later. Vinegar will lead to needle like crystals as pictured to the right. The appearance of the crystals doesn't really matter at this point because they'll be redissolved several times during the cleanup steps. |
Revision as of 19:21, 24 January 2013
| Note: | This page is a transcription of Melodic Catastrophe's Tao of Rue Extraction Tek [1]. The content is to remain accurate as such. |
Contents
- 1 Initial Notes
- 2 Background
- 3 Credits
- 4 Method
- 5 Final Notes and Tips
- 6 Reference
Initial Notes
There really isn't anything new in this Tek, it's just refining what is already known. This is more about streamlining the process and making it easier to work with. Please take the time to review and integrate the existing harmala teks so you have a general idea of the process.
- Harmalas Extraction and Separation Guide
- Easy Caapi Vine Alkaloid Extraction Guide
- Phlux's Telepathine Tek
Background
I've been doing rue extractions for a little over a year now. Compared to extracting spice, it's quite an undertaking. There is a lot of hard work involved and it's a very time consuming process. Until recently, my rue extractions have been kind of hit and miss. While I always end up with something, my yields and methodology left a lot to be desired. This tek helps keep things rolling with the minimal amount of waste possible and great final yields.
Credits
- Kudos to Endlessness for putting together the harmala extraction and separation guide[2] and to everyone who contributed to it.
- Kudos to Phlux- for his contribution to the Manske process[3]. It definitely leads to a far superior product in the end.
- Kudos to Gibran2 for his work with caapi extraction[4].
- Kudos for Plumsmooth for pointing out the text book Manske technique.
- Kudos to everyone who has been pioneering harmala extractions this whole time.
| Quote: | |
|---|---|
|
"The path of the Tao might not always be the easy one; But it is always the right one... May you walk the higher path...." |
Method
Step 1 - Grind Seeds
Start by freezing the seeds for a day or so and grind them. Freezing them makes it easier to grind them.
Step 2 - Boil Seeds
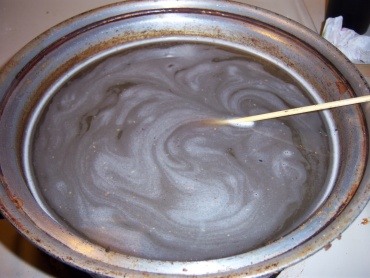
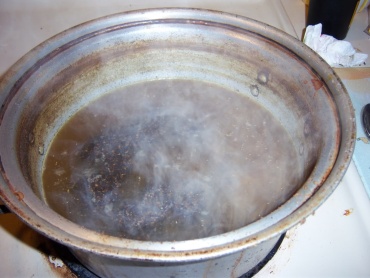
Boil the seeds with a dash of vinegar, citric or fumaric acid. This is where I use the large pot and I fill it to just under the rim with the seeds, water and acid. I then let it boil down to where you can see the water is just covering the seeds. It usually takes about 1.5 – 2 hours. (I keep it on a pretty hard boil during this stage. Not so much on the reducing stage.)
Tip: Let the seeds settle for awhile before pouring the liquid out of the pot.
Step 3 - Clean Brew
This is really a two part process but step 3a is optional if you want to keep the extraction process rolling along. It will just take more filtering supplies since you are processing all of the gunk instead of letting it settle.
3a - Settle & Decant
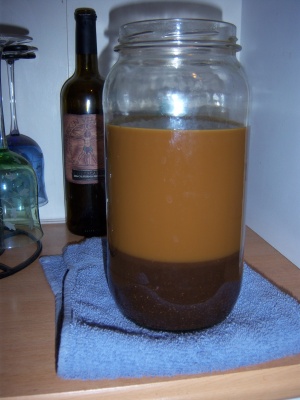
Pour everything through a strainer and into one of the large collection containers and allow it to settle at least overnight but longer won't hurt.
Then decant all of the murky yellow water off of the top and run it through filtering process shown in Step 3b to make sure that all insolubles are removed.
3b - Filter, Filter, Filter!
You want to begin the filtering process by first running the solution through the metal strainer to get the majority of the solids out of the tea. You'll want to add these solids back into the pot with fresh water and acid and continue to the boiling process while you filter the rest of the solution.
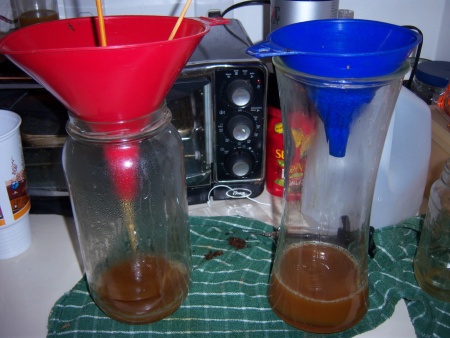
After you strain it you'll want to continue the filtering process by packing VERY loose cotton balls into the funnel. You want enough so that the cotton won't go through the hole when you add the liquid, but not enough to restrict the flow much.
These first few filter passes take the longest due to the amount of sludge that rue produces. This is why I prefer to use two funnels and collection jars. When the first funnel gets clogged, I decant the remaining liquid out and add it to the second collection jar until it gets clogged. When the second funnel gets clogged, I add fresh cotton to the first funnel and decant/transfer the liquid back over. I keep moving the tea back and forth until everything goes through and then I start the process over with tighter cotton.
Once it passes through the tightest cotton easily I move onto coffee filters and do the same process. If one gets clogged, move it to the other funnel. It's a real pain to get rue filtered properly but if you put in the effort you will be rewarded in the long run.
| Quote: | |
|---|---|
| "Impatience and improper Prep makes low quality medicine.
Don't jump the gun, make something you can be proud of." - Dorge |
Step 4 - Reduce
Once you have the solution filtered, it's time to reduce it. By this time you should have a pretty clear tea. Mydriasis has proven that this step isn't required but some prefer to do it anyway.
When I did my last extraction it worked out so that towards the end I had seeds boiling, solution filtering and another reducing at the same time. I would just bounce back and forth between each one, stirring or decanting. It worked out really well.
| Warning: | Lye can be very dangerous if not handled with RESPECT. Always wear gloves and proper eye protection when working with powerful bases. |
Step 5 - Base
After you have boiled, reduced and cleaned at least 3 pulls/boils you want to perform the first freebase of the molecules. Before you base the brew, run it through a coffee filter one more time just to make sure it is as clean as possible.
After you have filtered the brew, we'll make a lye or sodium carbonate solution. I don't mind using lye in this step because we're going to filter our alks and then redissolve them into some more vinegar to filter them some more. On the final base, I prefer to use sodium carbonate to keep things safe.
Once you make a basic solution you'll want to add it slowly to your tea while stirring.
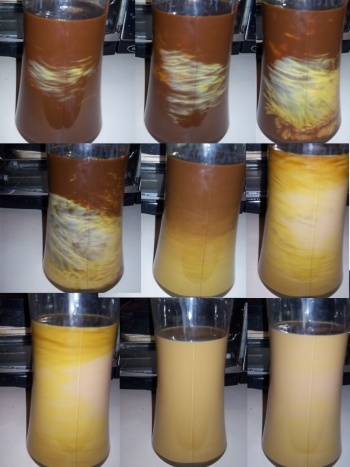
Keep adding it slowing while continuing to stir and you'll see the color changes starting to take place. Keep adding the base solution until everything goes milky.
That milky color is your alkaloids precipitating out.
You'll want to let this rest at least a few hours but preferably overnight or longer so that all of your alks can settle to the bottom.
Once your alks have settled, you want to decant as much of the basic liquid as possible.
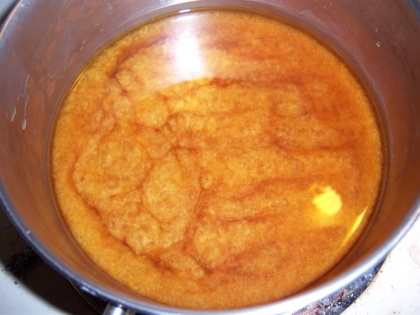
After you have decanted the basic (high ph) lye water off the top, you want to add some hot vinegar and water to your freebase alks to redissolve everything back into the solution as harmala acetates. Once your alkaloids are redissolved, filter out anything that won't dissolve. This is mostly plant matter and oils.
Step 6 - Manske
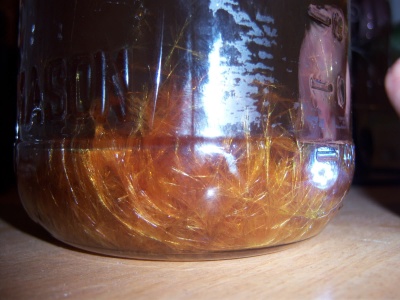
Once you have redissolved your alkaloids in a minimal amount of fresh, hot vinegar or as The Day Tripper pointed out, a fumaric acid solution, it's time to manske them. Day Trippers fumaric acid approach leads to chunkier crystals later. Vinegar will lead to needle like crystals as pictured to the right. The appearance of the crystals doesn't really matter at this point because they'll be redissolved several times during the cleanup steps.
There are three ways you can perform the manske.
The first and the "official" way is:
Recommended
Take a note of how many ml's you have and add 10 grams salt per 100ml solution. Make sure your solution is hot before you add the salt, otherwise the harmalas might fall out too soon. Allow to cool slowly.
The second way by Phlux-:
Prettier Crystals
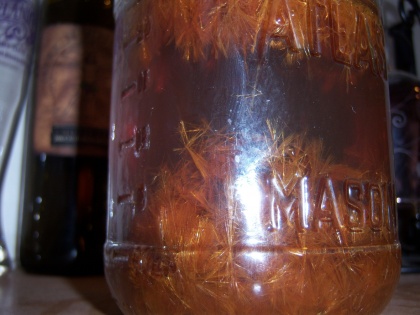
Take note of how many ml's you have and saturate the same amount of fresh distilled water with salt. Add them together and allow to cool slowly. If the first solution wasn't overly saturated with alks, you should get needles that are similar to what's pictured to the right. This seems to work better with an excess of water/vinegar to allow the crystals more room to grow.
The third way:
Completely saturate the solution with salt and allow to cool.
Not Recommended for Final Manske due to the higher chance of more salt contamination. It's better to use one of the above methods, preferably Phlux's on the final manske and push any remaining alks out by reducing the solution further after you filter the harmala hcl.
Step 7 - Filter
Once you are confident that no more growth is taking place, filter the solution with a coffee filter to collect all of the needles.
Step 8 - Redissolve
Redissolve your harmala hcl in a minimal amount of fresh hot water. It will take some heat (not too much) and time for everything to dissolve completely.
Step 9 - Manske
Once everything is nice and dissolved, you'll want to run it through another coffee filter or two just to get rid of any final impurities. Now that it's nice and filtered, you'll want to do the manske in step 6 again. This time it will give you even purer crystals.
| Note: | |
|---|---|
| Once again, depending on how much salt, water and time was used, you may want to keep the filtered solution and reduce it some more to "push" any stray alkaloids out. |
Step 10 - Filter
Once you're confident that the crystal growth has finished again, filter them through a coffee filter and redissolve them in hot water.
If you want ultra pure harmalas, it is recommended to do Steps 5 - 8 at least two or more times but no less than one more time. This will remove any final impurities.
For lab quality filtering techniques, check out this thread [5].
Step 11 - Base & Separate
It is now time to do your final basing. This time you want to use a sodium carbonate solution so your end product is food safe with the minimal amount of washing required. Do the exact same process as step 5 except if you want to separate the harmine from the harmaline you'll want to raise the ph to 8.75 and filter. This will give you approx 92% of the harmine. You really don't need a PH pen to do this, it's quite possible to do it by eye. After you filter, raise the ph of the solution again to get your harmaline and filter once again to retrieve your alkaloids.
For more information on this process refer to the Harmalas Extraction and Separation Guide, step 17.
Also refer to Phlux's Telepathine Tek
Also refer to Endlessness' thread about Sodium Carbonate [6]
Step 12 - Finish up
Wash and dry your harmalas and enjoy!
Please refer to Gibran's Easy Caapi Vine Alkaloid Extraction Guide, Step 6 Removing Excess NaOH, Salts etc for more info.
Final Notes and Tips
- As stated throughout the Tek, the most important part is getting the brew as clean as possible.
- Be sure to keep all used filters and cotton balls to the side and perform at least one final acid wash on them. I got 1.9g of clean harmalas from the used filters alone.
- Patience is key for this Tek. Be prepared to spend at least two or more days working on this, especially if you're working with large quantities.
- Be careful about spills! Syrian Rue is a very powerful dye and it WILL stain if it isn't cleaned up immediately. It's best to work in an area that the stains won't matter or on stainless steel if possible. Another alternative is to put down some cardboard on your counter tops and floors where you'll be working.
- When waiting for the freebased harmalas to settle, setting the container on a subwoofer or washing machine helps speed the process along.
- Keep all of the wash water and allow everything to settle for a couple of days. Sometimes those cloudy solutions can contain some extra harmalas if you want to get every last MG. *Kudos to evil804 for the last two tips.
