Difference between revisions of "The Inspirator mkII"
(working on alpha phase of development) |
TheTraveler (Talk | contribs) m (Text replace - "dmt-nexus.com" to "dmt-nexus.me") |
||
| (5 intermediate revisions by one user not shown) | |||
| Line 1: | Line 1: | ||
| − | {{Tek Header|<ref>[http://dmt-nexus. | + | {{Tek Header|<ref>[http://dmt-nexus.me/forum/default.aspx?g=posts&t=8985 The Inspirator mkII: a DIY convection heated vaporizer for use w/ bubblers by amor_fati]</ref>|<ref>[https://www.dmt-nexus.me/forum/default.aspx?g=posts&t=20006 Suggestion for vaporization--thoughts from the nursery?]</ref>}} |
<onlyinclude> | <onlyinclude> | ||
| Line 35: | Line 35: | ||
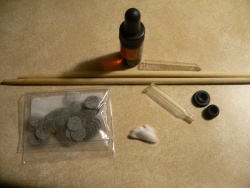
* Glass Dropper Bottle (for cleaning and preserving the piece) | * Glass Dropper Bottle (for cleaning and preserving the piece) | ||
* Ceramic Fiber (optional but preferable, in any form) | * Ceramic Fiber (optional but preferable, in any form) | ||
| + | ** '''Please use SuperWool 607 HT for health considerations.''' | ||
* 1 Round Metal Screen or Faucet Aerator (as long as the metal doesn't burn or melt with the use of a butane torch) | * 1 Round Metal Screen or Faucet Aerator (as long as the metal doesn't burn or melt with the use of a butane torch) | ||
* Chopsticks (preferably the cheap, skewer-type) | * Chopsticks (preferably the cheap, skewer-type) | ||
| Line 43: | Line 44: | ||
|colspan="2" valign="top"| | |colspan="2" valign="top"| | ||
===== Procedure for Construction ===== | ===== Procedure for Construction ===== | ||
| + | {{ShowInfo|[[Image:Note_error.png]]|'''Note:'''|Though this design is thought to minimize the possibility of exposure, SuperWool 607 HT should be used for health considerations, as ceramic fiber can be hazardous to the repiratory system.}} | ||
| + | |||
{{ShowInfo/In Article|[[Image:Information.png]]|'''Safety Note'''|Always preheat screens or other metal materials to be heated directly with a torch before use so as to ensure any potentially hazardous coatings have been burned off if present. | {{ShowInfo/In Article|[[Image:Information.png]]|'''Safety Note'''|Always preheat screens or other metal materials to be heated directly with a torch before use so as to ensure any potentially hazardous coatings have been burned off if present. | ||
|0px | |0px | ||
| Line 69: | Line 72: | ||
[[Image:Element condensing.JPG|thumb|left|250px|Condensing the element in a broken dropper stem.]] | [[Image:Element condensing.JPG|thumb|left|250px|Condensing the element in a broken dropper stem.]] | ||
[[Image:Element.JPG|thumb|right|250px|The finished heating element]] | [[Image:Element.JPG|thumb|right|250px|The finished heating element]] | ||
| + | [[Image:Inspirator_core-forge.jpg|thumb|left|250px|Condensing the element in an eraser cap w/ the end bored out.]] | ||
'''Final Touches:''' | '''Final Touches:''' | ||
To form the Element into a single unit that will fit snugly into the the bowl, use a tube of the same diameter as the dropper stem to be used and two chopsticks to press it into shape. A broken dropper stem is pictured, but something sturdier and less hazardous would be ideal--like a pen tube or pipe. The element could also be rolled around between fingertips to help reduce the springiness it may have when attempting to insert into the end of the bowl or dropper stem. It should fit snugly without slipping in or springing out. | To form the Element into a single unit that will fit snugly into the the bowl, use a tube of the same diameter as the dropper stem to be used and two chopsticks to press it into shape. A broken dropper stem is pictured, but something sturdier and less hazardous would be ideal--like a pen tube or pipe. The element could also be rolled around between fingertips to help reduce the springiness it may have when attempting to insert into the end of the bowl or dropper stem. It should fit snugly without slipping in or springing out. | ||
| Line 83: | Line 87: | ||
The plug for the bowl may be constructed in much the same manner as the heating element, but without the ceramic, rolling two screens together for the core instead. The plug should be inserted, shell first, into the stem a centimeter or so from the opening to provide space to load the vaporizing agent and protect it from overheating by keeping distance from the element. The plug will provide a bottom for the bowl, into which the agent may be melted and prepped for inspiration. | The plug for the bowl may be constructed in much the same manner as the heating element, but without the ceramic, rolling two screens together for the core instead. The plug should be inserted, shell first, into the stem a centimeter or so from the opening to provide space to load the vaporizing agent and protect it from overheating by keeping distance from the element. The plug will provide a bottom for the bowl, into which the agent may be melted and prepped for inspiration. | ||
| − | Gaskets are then installed using the sort commonly found for use in plumbing, or else made from rolled up sections latex tubing. The gaskets must serve two purposes: A cool grip for carbing (if using pull-stem) and most importantly, a seal for the bubbler. These will be removed along with the element when in storage if using a dropper bottle as recommended, so a separate container for those would be ideal. | + | Gaskets are then installed using the sort commonly found for use in plumbing, or else made from rolled up sections latex tubing. The gaskets must serve two purposes: A cool grip for carbing (if using pull-stem) or general handling and most importantly, a seal for the bubbler. These will be removed along with the element when in storage if using a dropper bottle as recommended, so a separate container for those would be ideal. |
| − | + | ||
| − | + | ||
| − | + | ||
| − | + | ||
| − | + | ||
| − | + | ||
====== Going Further for [[Changa]] and Enhanced Versatility ====== | ====== Going Further for [[Changa]] and Enhanced Versatility ====== | ||
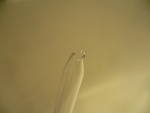
| − | [[Image:Inspirator | + | [[Image:Inspirator broken-tip.jpg|thumb|right|150px|Sharp, jagged edges after clipping.]] |
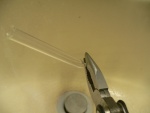
[[Image:Inspirator Tip-clip.jpg|thumb|left|150px|Crushing the tip with pliers.]] | [[Image:Inspirator Tip-clip.jpg|thumb|left|150px|Crushing the tip with pliers.]] | ||
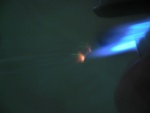
| − | [[Image:Inspirator | + | [[Image:Inspirator melt-tip.jpg|thumb|left|150px|Melting the tip w/ butane torch.]] |
[[Image:Inspirator plunging-down.jpg|thumb|right|150px|Plunging down.]] | [[Image:Inspirator plunging-down.jpg|thumb|right|150px|Plunging down.]] | ||
[[Image:Inspirator plunging-up.jpg|thumb|right|150px|Plunging back up into place.]] | [[Image:Inspirator plunging-up.jpg|thumb|right|150px|Plunging back up into place.]] | ||
| − | '''Clipping the Tip''' | + | '''Clipping the Tip:''' |
A very simple process, but be safe and take the appropriate protective measures! Over a garbage can, sink or what have you, grab the tip of the dropper firmly with pliers. Apply slow, steady pressure until the tip shatters. Pieces of glass will tend to fly out a ways, so shield eyes, sweep, wipe surfaces with a damp paper towel or whatever needs to be done to protect oneself and others from debris. Wash debris from the piece with running water. | A very simple process, but be safe and take the appropriate protective measures! Over a garbage can, sink or what have you, grab the tip of the dropper firmly with pliers. Apply slow, steady pressure until the tip shatters. Pieces of glass will tend to fly out a ways, so shield eyes, sweep, wipe surfaces with a damp paper towel or whatever needs to be done to protect oneself and others from debris. Wash debris from the piece with running water. | ||
[[Image:Inspirator melted-tip.jpg|thumb|left|150px|Final product after melting the tip.]] | [[Image:Inspirator melted-tip.jpg|thumb|left|150px|Final product after melting the tip.]] | ||
| − | '''Melting the Edges''' | + | '''Melting the Edges:''' |
There will be sharp edges and cracks where the piece was broken, so melting will be necessary to ensure the safety and integrity of the piece. | There will be sharp edges and cracks where the piece was broken, so melting will be necessary to ensure the safety and integrity of the piece. | ||
# Suspend the tube as deemed fit to avoid burning oneself. | # Suspend the tube as deemed fit to avoid burning oneself. | ||
| Line 109: | Line 107: | ||
#* ''This end must be accessible in order to position the plug wherever needed.'' | #* ''This end must be accessible in order to position the plug wherever needed.'' | ||
| − | '''Advantage and Exploitation of Accessibility''' | + | '''Advantage and Exploitation of Accessibility:''' |
The only way to properly vaporize--avoiding combustion or overheating--from changa, enhanced leaf, a leaf-bed or even straight spice, for that matter, is to position the plug so that the material to be vaporized is a safe distance from the heating element. Volatiles (pure actives, typically) should usually be at least 0.5cm, while combustibles (enhanced leaf or some impure actives) should be positioned more than 1cm from the heating element. In some cases, drippage or runoff may occur; in such cases, it can be retrieved by simply plunging the plug all the way down to the tip, then back up into place. | The only way to properly vaporize--avoiding combustion or overheating--from changa, enhanced leaf, a leaf-bed or even straight spice, for that matter, is to position the plug so that the material to be vaporized is a safe distance from the heating element. Volatiles (pure actives, typically) should usually be at least 0.5cm, while combustibles (enhanced leaf or some impure actives) should be positioned more than 1cm from the heating element. In some cases, drippage or runoff may occur; in such cases, it can be retrieved by simply plunging the plug all the way down to the tip, then back up into place. | ||
| Line 119: | Line 117: | ||
---- | ---- | ||
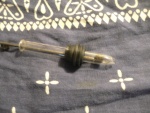
| + | [[Image:Inspirator set.JPG|thumb|right|200px]] | ||
===== Effective Use and Maintenance ===== | ===== Effective Use and Maintenance ===== | ||
| − | Storage, preservation, and cleaning: | + | '''Storage, preservation, and cleaning:''' |
:# Fill a dropper bottle with [[IPA]]. | :# Fill a dropper bottle with [[IPA]]. | ||
:# Install the dropper stem as per normal and pipette the IPA repeatedly. | :# Install the dropper stem as per normal and pipette the IPA repeatedly. | ||
:# Fill the stem before sealing away for storage. | :# Fill the stem before sealing away for storage. | ||
| − | * Before use, the pipetting process may be repeated, followed by a rinse with | + | * '''Before use''', the pipetting process may be repeated, followed by a '''rinse with running water''' and blow drying the piece by mouth. |
| − | * While proper use will yield very little to clean, repeated use may result in precipitation beyond the plug. | + | * While proper use with a pure product will yield very little to clean, repeated use may result in precipitation beyond the plug. |
| − | Heat application and inspiration: | + | '''Heat application and inspiration:''' |
:# Load the agent all the way down to the plug. | :# Load the agent all the way down to the plug. | ||
| − | :# | + | :#* ''Optionally, feather the glass around the plug with a torch lightly to melt the agent into the plug.'' |
:# Place the element snugly into the open end of the bowl. | :# Place the element snugly into the open end of the bowl. | ||
:# Apply flame '''only''' while inhaling, applying enough to cause the element to glow, and applying frequently enough to attain constant vapor production. | :# Apply flame '''only''' while inhaling, applying enough to cause the element to glow, and applying frequently enough to attain constant vapor production. | ||
| + | :#* ''''Prolonged application of the flame to the heating element may result in cracking of the glass, as well as general overheating in some cases. To avoid this, feather along the tip in a tight circular motion removing the flame periodically, gauging the effectiveness by repeatedly quickly pulling the carb. The element may eventually take on enough heat to continue producing vapor without the flame.'''' | ||
:#* For the "'''Spiceliner'''" variation, using ceramic fiber, the flame may come into contact with the heating element and at any angle with little trouble. | :#* For the "'''Spiceliner'''" variation, using ceramic fiber, the flame may come into contact with the heating element and at any angle with little trouble. | ||
| − | :#* For the "'''Night Elf'''" variation, using only steel screens, | + | :#* For the "'''Night Elf'''" variation, using only steel screens, direct heating in line with the bowl should be avoided, and direct contact with the heating element and the torch should not be made. |
| − | + | {{ShowInfo/In Article|[[Image:Information.png]]|'''Note on Dosage'''|30-40mg spice should be sufficient for a breakthrough if accomplished in a single toke. The level of effects attained at this dosage is adequate for gauging the effectiveness of technique. | |
| + | |0px | ||
| + | | | ||
| + | }} | ||
| + | |||
| + | [[Image:Inspirator spare-parts.jpg|thumb|left|150px]] | ||
| + | [[Image:Inspirator cap.jpg|thumb|right|150px]] | ||
| + | '''Tips and Tricks:''' | ||
| + | :* Keep a kit of spare parts and extra devices handy: Not only is it quite possible to break a device or lose any of the smaller parts of this design, but it would be handy to have multiples for guests. | ||
| + | :* Besides storing the device in a dropper bottle, the dropper bulb could be used as cap to seal the end of the piece, containing the heat element as well as possibly any loose contents. | ||
| + | :* The Inspirator may also be used without a bubbler for portability, stealth, and resource considerations. | ||
| + | |||
[[Image:Inspirator display.JPG|center|550px]] | [[Image:Inspirator display.JPG|center|550px]] | ||
| + | |||
| Line 147: | Line 159: | ||
:* To q21q21 and Bumber for inspiring the development of the progenitor of this method.<ref>[[The Mini-Machine Bubbler Stem]]</ref> | :* To q21q21 and Bumber for inspiring the development of the progenitor of this method.<ref>[[The Mini-Machine Bubbler Stem]]</ref> | ||
</onlyinclude> | </onlyinclude> | ||
| − | :* To OpeningPandorasBox for "The Key," which helped to inspire the development of this device.<ref>[https://www.dmt-nexus. | + | :* To OpeningPandorasBox for "The Key," which helped to inspire the development of this device.<ref>[https://www.dmt-nexus.me/forum/default.aspx?g=posts&t=11711 The Key - Portable $5 Vaporizer - Assembly Instructions]</ref><ref>[https://www.dmt-nexus.me/forum/default.aspx?g=posts&t=12092 The Key V2 - Water Pipe Vaporizer]</ref> |
====== Reference ====== | ====== Reference ====== | ||
{{Page Footer|Administration Tek|DMT}} | {{Page Footer|Administration Tek|DMT}} | ||
Latest revision as of 20:57, 31 January 2012
| Note: | This page tracks the development of The Inspirator mkII.[1] The content is to remain accurate as such. |
For further reference and discussion, see references:[2]
|
in·spi·ra·tor (ĭn'spə-rā'tər) n.
[From Late Latin, from inspirare 'to inspire' (from in- + spirare 'to breathe') + -tor; cognate with, and possibly derived via, English or German] |
|---|
The Inspirator mkII is considered by its designer to be the criterion of efficiency for vaporizing spice, and to be a cheap and effective method of achieving sufficiently cool, full, measured doses. The device is inspired in part by The Machine but operates by convection heating--diffusing the heat through a ceramic heat-sink, in turn heating the airflow--rather than heating by conduction. This design was the final evolution of The Mini-Machine Bubbler Stem and the original version of The Inspirator.
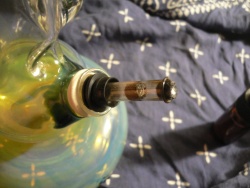
This particular model of the Inspirator utilizes a removable heating element to enable spice to be loaded into the top-side of the bowl, preventing the occurrence of run-off or drip. The position of the element in relation to the plug also helps prevent overheating or burning by conduction, while the element itself serves to protect from exposure to the flame.
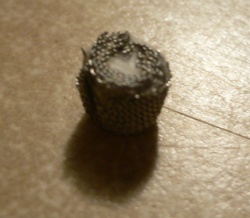
Final Touches:
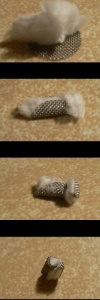
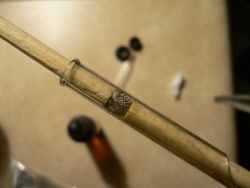
To form the Element into a single unit that will fit snugly into the the bowl, use a tube of the same diameter as the dropper stem to be used and two chopsticks to press it into shape. A broken dropper stem is pictured, but something sturdier and less hazardous would be ideal--like a pen tube or pipe. The element could also be rolled around between fingertips to help reduce the springiness it may have when attempting to insert into the end of the bowl or dropper stem. It should fit snugly without slipping in or springing out.
When in place, the element will permit air passage through and around itself, into the bowl, and since the element itself will absorb the heat application of the torch, it will in turn heat the air flow while protecting the contents of the bowl from the flame.
| Variations in Design | |
|---|---|
| As ceramic fiber may not be readily available, it may be omitted and replaced with a second screen rolled up for the core for the "Night Elf" variation in technique and design, vice the "Spiceliner" variation which utilizes ceramic fiber. |
Constructing the Bowl
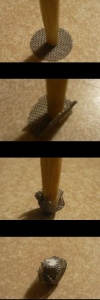
The plug for the bowl may be constructed in much the same manner as the heating element, but without the ceramic, rolling two screens together for the core instead. The plug should be inserted, shell first, into the stem a centimeter or so from the opening to provide space to load the vaporizing agent and protect it from overheating by keeping distance from the element. The plug will provide a bottom for the bowl, into which the agent may be melted and prepped for inspiration.
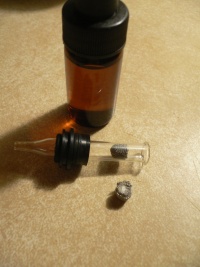
Gaskets are then installed using the sort commonly found for use in plumbing, or else made from rolled up sections latex tubing. The gaskets must serve two purposes: A cool grip for carbing (if using pull-stem) or general handling and most importantly, a seal for the bubbler. These will be removed along with the element when in storage if using a dropper bottle as recommended, so a separate container for those would be ideal.
Going Further for Changa and Enhanced Versatility
Clipping the Tip:
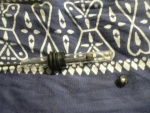
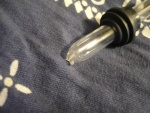
A very simple process, but be safe and take the appropriate protective measures! Over a garbage can, sink or what have you, grab the tip of the dropper firmly with pliers. Apply slow, steady pressure until the tip shatters. Pieces of glass will tend to fly out a ways, so shield eyes, sweep, wipe surfaces with a damp paper towel or whatever needs to be done to protect oneself and others from debris. Wash debris from the piece with running water.
Melting the Edges:
There will be sharp edges and cracks where the piece was broken, so melting will be necessary to ensure the safety and integrity of the piece.
- Suspend the tube as deemed fit to avoid burning oneself.
- With a butane torch, apply the flame right to the end where there are sharp jagged edges and cracks.
- The glass will glow red, cracks will seal, and edges will round off.
- The hole will likely close a bit, so if necessary, push a metal rod through while heating.
- This end must be accessible in order to position the plug wherever needed.
Advantage and Exploitation of Accessibility:
The only way to properly vaporize--avoiding combustion or overheating--from changa, enhanced leaf, a leaf-bed or even straight spice, for that matter, is to position the plug so that the material to be vaporized is a safe distance from the heating element. Volatiles (pure actives, typically) should usually be at least 0.5cm, while combustibles (enhanced leaf or some impure actives) should be positioned more than 1cm from the heating element. In some cases, drippage or runoff may occur; in such cases, it can be retrieved by simply plunging the plug all the way down to the tip, then back up into place.
Effective Use and Maintenance
Storage, preservation, and cleaning:
- Fill a dropper bottle with IPA.
- Install the dropper stem as per normal and pipette the IPA repeatedly.
- Fill the stem before sealing away for storage.
- Before use, the pipetting process may be repeated, followed by a rinse with running water and blow drying the piece by mouth.
- While proper use with a pure product will yield very little to clean, repeated use may result in precipitation beyond the plug.
Heat application and inspiration:
- Load the agent all the way down to the plug.
- Optionally, feather the glass around the plug with a torch lightly to melt the agent into the plug.
- Place the element snugly into the open end of the bowl.
- Apply flame only while inhaling, applying enough to cause the element to glow, and applying frequently enough to attain constant vapor production.
- 'Prolonged application of the flame to the heating element may result in cracking of the glass, as well as general overheating in some cases. To avoid this, feather along the tip in a tight circular motion removing the flame periodically, gauging the effectiveness by repeatedly quickly pulling the carb. The element may eventually take on enough heat to continue producing vapor without the flame.'
- For the "Spiceliner" variation, using ceramic fiber, the flame may come into contact with the heating element and at any angle with little trouble.
- For the "Night Elf" variation, using only steel screens, direct heating in line with the bowl should be avoided, and direct contact with the heating element and the torch should not be made.
- Load the agent all the way down to the plug.
| Note on Dosage | |
|---|---|
| 30-40mg spice should be sufficient for a breakthrough if accomplished in a single toke. The level of effects attained at this dosage is adequate for gauging the effectiveness of technique. |
Tips and Tricks:
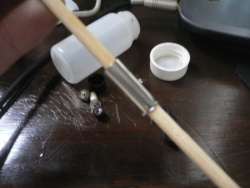
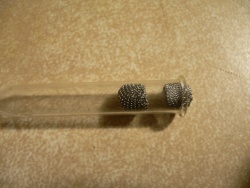
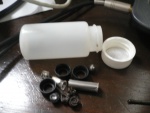
- Keep a kit of spare parts and extra devices handy: Not only is it quite possible to break a device or lose any of the smaller parts of this design, but it would be handy to have multiples for guests.
- Besides storing the device in a dropper bottle, the dropper bulb could be used as cap to seal the end of the piece, containing the heat element as well as possibly any loose contents.
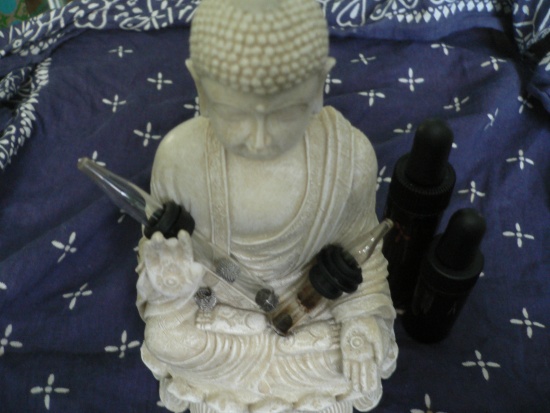
- The Inspirator may also be used without a bubbler for portability, stealth, and resource considerations.
Appendices
Special Thanks
Reference
- ↑ The Inspirator mkII: a DIY convection heated vaporizer for use w/ bubblers by amor_fati
- ↑ Suggestion for vaporization--thoughts from the nursery?
- ↑ Bubbler Bowl Variation of "The Machine"
- ↑ The Mini-Machine Bubbler Stem
- ↑ The Key - Portable $5 Vaporizer - Assembly Instructions
- ↑ The Key V2 - Water Pipe Vaporizer
