Difference between revisions of "The Mini-Machine Bubbler Stem"
m |
TheTraveler (Talk | contribs) m (Text replace - "dmt-nexus.com" to "dmt-nexus.me") |
||
| (16 intermediate revisions by one user not shown) | |||
| Line 1: | Line 1: | ||
| − | {{ShowInfo|[[Image:Note_error.png]]|'''Note:'''|This page tracks the development of amor_fati's Mini-Machine Bubbler Stem<ref>amor_fati's Mini-Machine Bubbler Stem[http://dmt-nexus. | + | {{ShowInfo|[[Image:Note_error.png]]|'''Note:'''|This page tracks the development of amor_fati's Mini-Machine Bubbler Stem<ref>amor_fati's Mini-Machine Bubbler Stem[http://dmt-nexus.me/forum/default.aspx?g=posts&t=8230]</ref>. The content is to remain accurate as such.}} |
| + | The advantage of [[The Machine]] is that having a copper or steel mesh between the product and the flame protects the product from direct contact with the flame as well as distributing the heat of the flame evenly and rapidly to the product. However, most have a difficult time constructing one in the recommended fashion. Also, many prefer to cool their vapor by bubbling it through water during administration, and a properly fashioned "machine" does not easily facilitate this. The following is a proposal for remedying both difficulty in construction and lack of versatility by a simple modified design of "the machine." | ||
<onlyinclude> | <onlyinclude> | ||
| − | + | [[The Mini-Machine Bubbler Stem]] is considered by its creator to be an effective and cheap alternative to most other vaporizing devices, and to be most effective when multiple hits are desired over single full measured doses. | |
| − | + | ||
| − | === Procedure for Construction === | + | ===== Procedure for Construction ===== |
{{materials_list | {{materials_list | ||
| Line 16: | Line 16: | ||
* Butane Torch (same one that will be used for vaporization) | * Butane Torch (same one that will be used for vaporization) | ||
* Glass Dropper Stem (either from a pharmacy OTC or an online vendor) | * Glass Dropper Stem (either from a pharmacy OTC or an online vendor) | ||
| − | * Copper or Stainless Steel Pan Scrubber (as long as the metal doesn't burn | + | * Copper or Stainless Steel Pan Scrubber (as long as the metal doesn't burn or melt with the use of a butane torch) |
* A Thin Metal Rod (even a paper clip would probably work) | * A Thin Metal Rod (even a paper clip would probably work) | ||
* Pliers | * Pliers | ||
| − | * | + | * Rubber Gasket and/or Latex Tubing |
}} | }} | ||
<table> | <table> | ||
| Line 28: | Line 28: | ||
</table> | </table> | ||
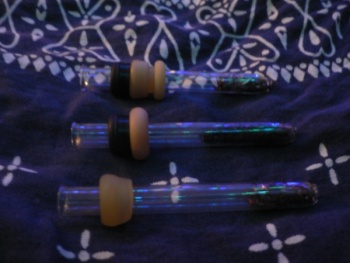
[[Image:P1050511.JPG|thumb|350px|Some variations in design.]] | [[Image:P1050511.JPG|thumb|350px|Some variations in design.]] | ||
| − | # Carefully crush the nozzle of the dropper stem with pliers, leaving a slight portion of the | + | # Carefully crush the nozzle of the dropper stem with pliers, leaving a slight portion of the nozzle's curve. |
| + | #* ''be sure to wash out any lingering pieces of glass.'' | ||
# Heat the broken end of the stem with a torch so that the sharp edges are dulled and any cracks sealed. | # Heat the broken end of the stem with a torch so that the sharp edges are dulled and any cracks sealed. | ||
# Cut off a piece of the metal scrub pad, hold it with pliers, and burn with a torch under an oven hood until no more smoke is emitted. | # Cut off a piece of the metal scrub pad, hold it with pliers, and burn with a torch under an oven hood until no more smoke is emitted. | ||
| Line 36: | Line 37: | ||
#* ''alternatively and more cheaply, a small section of latex tubing could be rolled or folded into a ring around the stem to serve the same purpose.'' | #* ''alternatively and more cheaply, a small section of latex tubing could be rolled or folded into a ring around the stem to serve the same purpose.'' | ||
| − | === Administration. === | + | ===== Administration. ===== |
[[Image:P1050454.JPG|thumb|320px|For use as a portable vaporizer, attach the nozzle of a straight dropper stem to the open end by a small section of latex tubing. ]] | [[Image:P1050454.JPG|thumb|320px|For use as a portable vaporizer, attach the nozzle of a straight dropper stem to the open end by a small section of latex tubing. ]] | ||
| Line 47: | Line 48: | ||
#* ''once the device reaches a sufficient temperature, it will give off vapor rapidly and will not necessarily require continued heat application.'' | #* ''once the device reaches a sufficient temperature, it will give off vapor rapidly and will not necessarily require continued heat application.'' | ||
# If runoff occurs, push the mesh plug to the open end, then back down to the nozzle end to collect it for further administration. | # If runoff occurs, push the mesh plug to the open end, then back down to the nozzle end to collect it for further administration. | ||
| + | #* ''a finger placed on the nozzle-end when pushing the plug back into place may prevent much of the stress on the glass that could result in breakage.'' | ||
<table> | <table> | ||
<tr> | <tr> | ||
| Line 67: | Line 69: | ||
}} | }} | ||
| − | === Notes on | + | ===== Notes on Effective Use and Maintenance ===== |
{{Procedure | {{Procedure | ||
|for Cleaning the Mini-Machine | |for Cleaning the Mini-Machine | ||
| | | | ||
| + | {{ShowInfo/In Article|[[Image:Information.png]]|'''NOTE'''|Though acetone works well for this, it can be dangerous in terms of inhalation of fumes and potential fire hazard. A good nontoxic alternative is to use vinegar to clean the piece, then a sodium carbonate solution to neutralize the acetic acid in the vinegar, then water to wash out any residual base or salts. Heat application may help to remove residual moisture from the plug. | ||
| + | |0px | ||
| + | | | ||
| + | }} | ||
# ''Attach a chemically resistant dropper bulb to the open end.'' | # ''Attach a chemically resistant dropper bulb to the open end.'' | ||
| − | # ''Prepare a flask of | + | # ''Prepare a flask of cleaning solvent.'' |
| − | # ''Draw in the | + | # ''Draw in the solvent and squirt out through the plug until sufficiently clean.'' |
| + | #* <small>''actives may potentially be salvaged from cleaning solvent collected over time.''</small> | ||
# ''Scrub with a q-tip.'' | # ''Scrub with a q-tip.'' | ||
| − | # ''Carefully blow out remaining | + | # ''Carefully blow out remaining solvent.'' |
# ''Scrub out moisture with the other end of the q-tip.'' | # ''Scrub out moisture with the other end of the q-tip.'' | ||
| − | # ''Ensure the absence of residual | + | # ''Ensure the absence of residual solvent prior to use.'' |
}} | }} | ||
| Line 85: | Line 92: | ||
* For group sessions, it would be easiest to prepare an individual piece for each person so that dosage can be more easily regulated. | * For group sessions, it would be easiest to prepare an individual piece for each person so that dosage can be more easily regulated. | ||
* When handling the piece after heating, handle by the gasket and avoid any part of the heated portion of the glass coming into any contact with hard surfaces. | * When handling the piece after heating, handle by the gasket and avoid any part of the heated portion of the glass coming into any contact with hard surfaces. | ||
| − | * A good way to cool down a stem is to roll it rapidly between the palms, drawing the heat off the glass. | + | * A good way to cool down a stem is to roll it rapidly between the palms, drawing the heat off the glass with one's hands. |
| + | * If the the nozzle end of the piece breaks off at any point, carefully push the plug to the other end of the piece when it has sufficiently cooled, heat the sharp edges until dulled, and push the plug back into place firmly, with a finger in place causing the plug to mushroom slightly until it fits snugly in place. | ||
* Ensure adequate airflow through the piece by poking holes in the plug with a safety pin. | * Ensure adequate airflow through the piece by poking holes in the plug with a safety pin. | ||
* Develop a relationship with the device. | * Develop a relationship with the device. | ||
| + | </onlyinclude> | ||
| − | + | ===== Appendices ===== | |
| − | + | ||
| − | + | Special Thanks: | |
| − | + | * To Warrensaged for pioneering the use of a machine-style bowl with a bubbler. | |
| − | + | * To q21q21 for inspiring SWIM to develop this method. | |
| − | + | ||
| − | === Reference === | + | ====== Reference ====== |
| − | {{Page_Footer|Administration | + | {{Page_Footer|Administration Tek|DMT}} |
Latest revision as of 20:57, 31 January 2012
| Note: | This page tracks the development of amor_fati's Mini-Machine Bubbler Stem[1]. The content is to remain accurate as such. |
The advantage of The Machine is that having a copper or steel mesh between the product and the flame protects the product from direct contact with the flame as well as distributing the heat of the flame evenly and rapidly to the product. However, most have a difficult time constructing one in the recommended fashion. Also, many prefer to cool their vapor by bubbling it through water during administration, and a properly fashioned "machine" does not easily facilitate this. The following is a proposal for remedying both difficulty in construction and lack of versatility by a simple modified design of "the machine."
The Mini-Machine Bubbler Stem is considered by its creator to be an effective and cheap alternative to most other vaporizing devices, and to be most effective when multiple hits are desired over single full measured doses.
Contents
Procedure for Construction
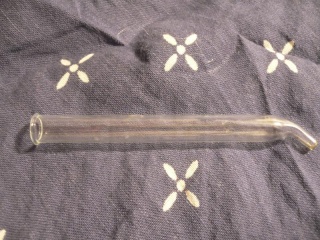
- Carefully crush the nozzle of the dropper stem with pliers, leaving a slight portion of the nozzle's curve.
- be sure to wash out any lingering pieces of glass.
- Heat the broken end of the stem with a torch so that the sharp edges are dulled and any cracks sealed.
- Cut off a piece of the metal scrub pad, hold it with pliers, and burn with a torch under an oven hood until no more smoke is emitted.
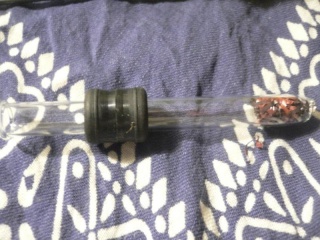
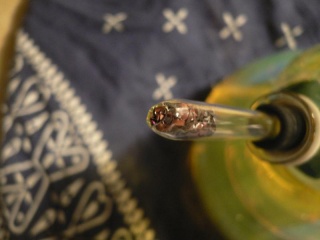
- After it has cooled, stuff it in the larger end of the dropper stem, and use a thin metal rod to stuff it down toward the nozzle-end somewhat tightly, and so that a part of the mesh is exposed out of the broken end.
- experiment with different lengths of plugs to determine what size is optimal for preventing runoff and providing even, rapid heating.
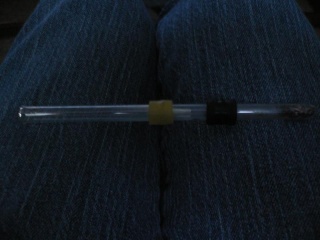
- Fit two gaskets on the stem far enough from the plug to avoid heat but far enough from the other end to provide a stable stem.
- alternatively and more cheaply, a small section of latex tubing could be rolled or folded into a ring around the stem to serve the same purpose.
Administration.
- Place product into the open end of the stem and stuff down to the plug with a thin metal rod.
- Feather the glass with a torch until the product melts into the mesh plug.
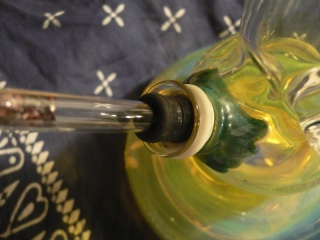
- Insert the stem into a bubbler as a bowl, with the open end in.
- Use a torch to apply heat to the mesh plug while drawing air through the bubbler.
- keeping some distance with the torch is recommended to avoiding burning or overheating.
- once the device reaches a sufficient temperature, it will give off vapor rapidly and will not necessarily require continued heat application.
- If runoff occurs, push the mesh plug to the open end, then back down to the nozzle end to collect it for further administration.
- a finger placed on the nozzle-end when pushing the plug back into place may prevent much of the stress on the glass that could result in breakage.
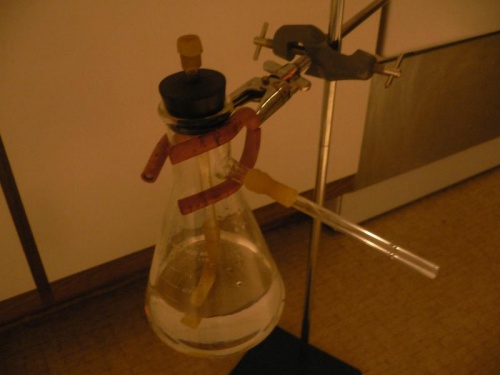
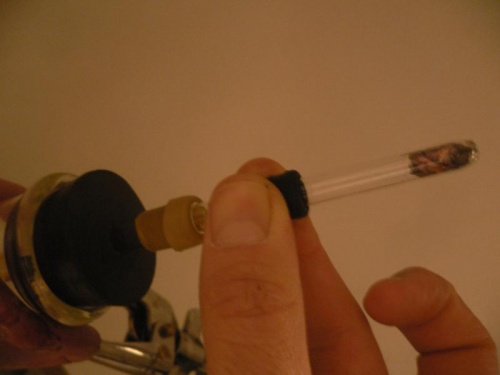
| Use with an Improvised Labware Bubbler | ||
|---|---|---|
|
|
Notes on Effective Use and Maintenance
- A handy method for storing the piece would be to cap the nozzle end with the dropper bulb in order to protect from breakage and keep track of the bulb to use when cleaning.
- The second gasket generally makes the piece safer to handle--especially if used as a pull stem--while the other provides a seal.
- For group sessions, it would be easiest to prepare an individual piece for each person so that dosage can be more easily regulated.
- When handling the piece after heating, handle by the gasket and avoid any part of the heated portion of the glass coming into any contact with hard surfaces.
- A good way to cool down a stem is to roll it rapidly between the palms, drawing the heat off the glass with one's hands.
- If the the nozzle end of the piece breaks off at any point, carefully push the plug to the other end of the piece when it has sufficiently cooled, heat the sharp edges until dulled, and push the plug back into place firmly, with a finger in place causing the plug to mushroom slightly until it fits snugly in place.
- Ensure adequate airflow through the piece by poking holes in the plug with a safety pin.
- Develop a relationship with the device.
Appendices
Special Thanks:
- To Warrensaged for pioneering the use of a machine-style bowl with a bubbler.
- To q21q21 for inspiring SWIM to develop this method.
